This page helps the user to send a screen pop message with IVR data to Notifier/Web Notifier.
Option 1: Send a screen pop message with IVR data to Notifier/Web Notifier from Web Application.
Step-by-step guide
- Go to Linkscope Web application and if you're not already signed in, select Sign in.
From the Linkscope Web application, you click to Diagnostic → ScreenPop → Test Pop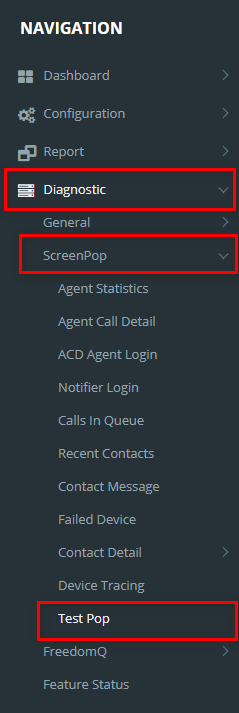
- At this page, you enter Phone Number, DNIS, VDN, Extension, IVR Data (Phone number, and Extension are the required fields). Then click the Send screen pop button.
- Phone Number: Caller ID which initiated the call. This should be the caller's phone number
- DNIS: The internal number which caller will call to
- VDN: Agent VDN or Agent Queue number
- Extension: Agent extension which will answer the call
- IVR Data: Formatted data which IVR will insert to Primas CX server when the caller interacts with IVR. The data format is data_key1;data_value1;data_key2;data_value2
- Monitor checkbox: When users check Monitor and click Save button, the monitor function tells system to monitor every call. If there is a call which the caller ID is the "Phone Number", the system will insert sample data from "IVR data" for that call to display data on the screen pop.

If you are using the Windows Notifier, at that time, the screen pop will be opened at Notifier of the agent's desktop with the IVR data.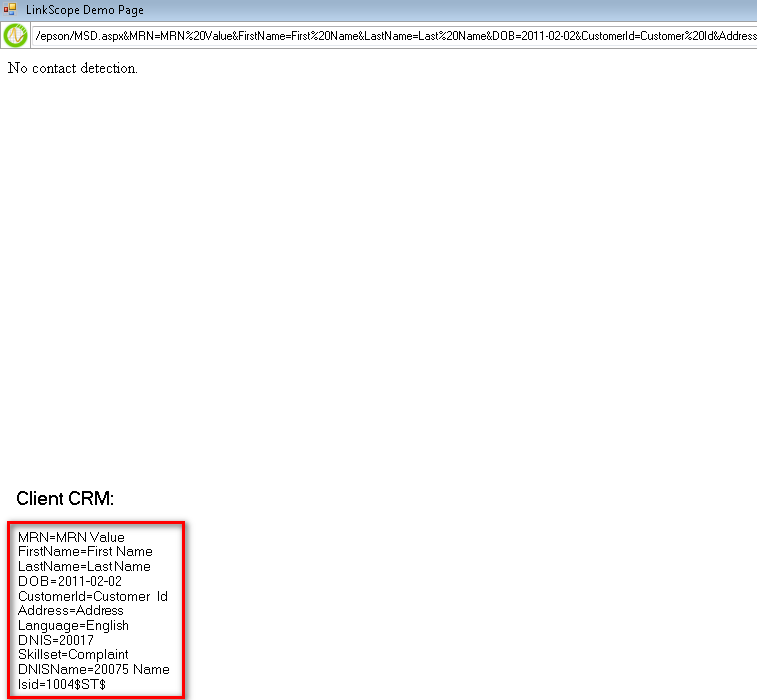
If you are using the Web Notifier, there will the pop-up with the IVR.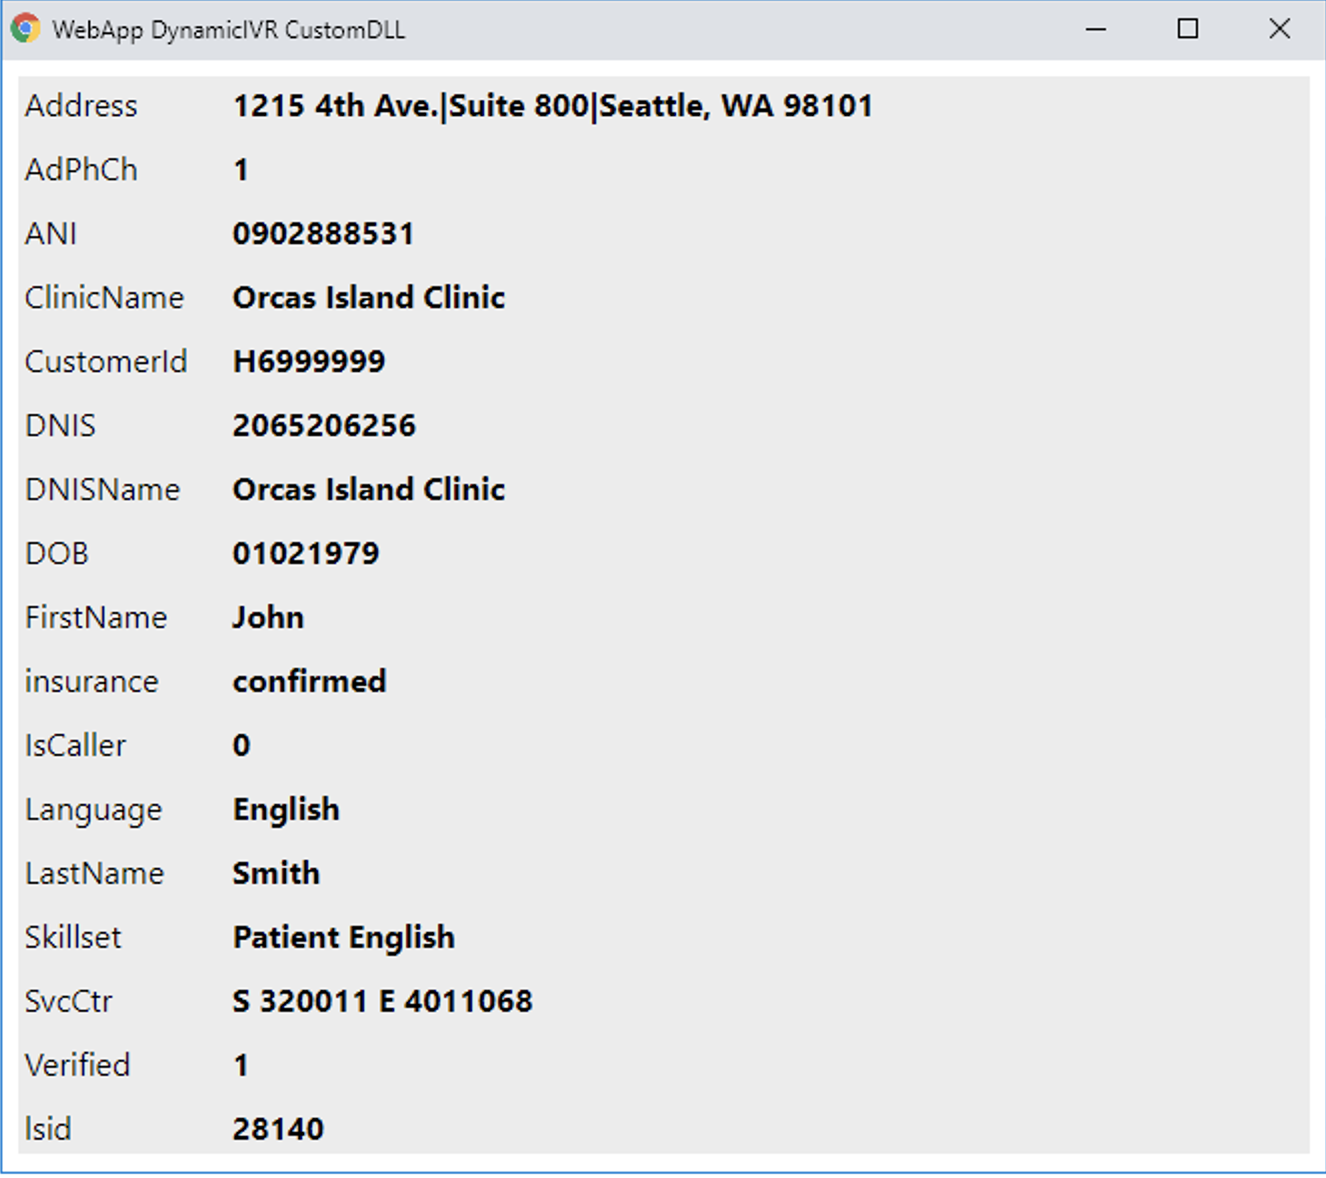
After sending the screen pop successfully, the Send disconnect button will be displayed. You click on it to Linkscope send the disconnect message to Notifier.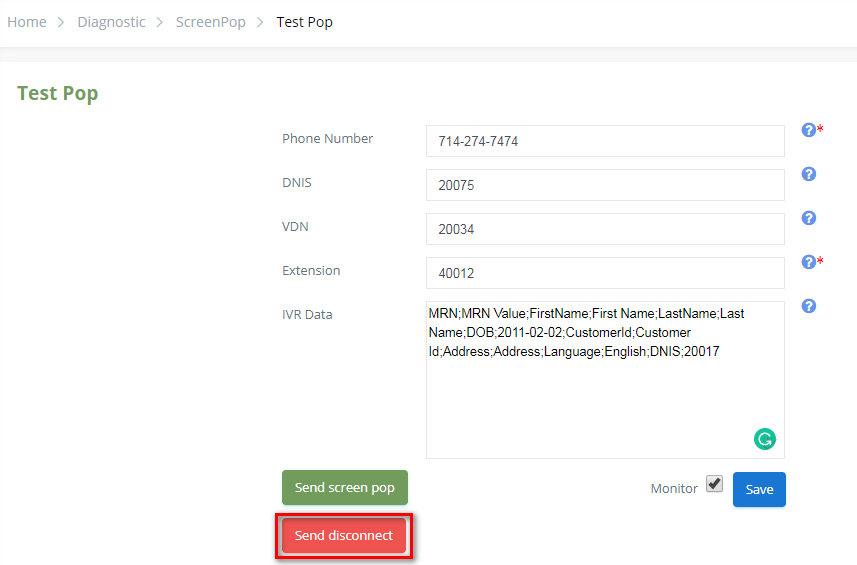
After sending the disconnect message successfully, this button will be disabled.
Option 2: Send a screen pop message from Primas Web Notifier.
Step-by-step guide
Step 1: Login to Primas Web Notifier
Click on Primas Web Notifier![]() at the top-right corner of the web browser toolbar, it will display the login screen.
at the top-right corner of the web browser toolbar, it will display the login screen.
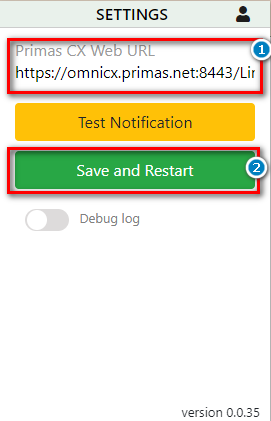
- From Primas Web Notifier, enter the URL of the Primas CX web app (1).
- Click the "Save and Restart" button (2).
Next, log in to Primas Web Notifier by entering Extension for 3 boxes: Username, Password, Extension (They are the required fields) and click Sign In or press Enter key.
- Username (1).
- Password (2).
- Extension: Agent extension (3).

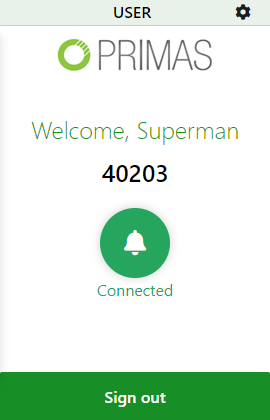
Primas Web Notifier when login success.
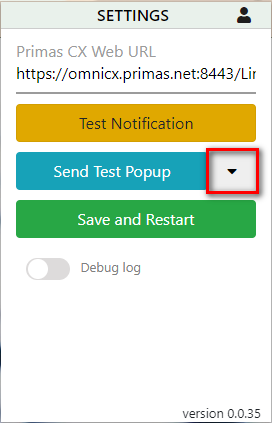
Step 2: Send Test Popup
From Primas Web Notifier, Click ![]() navigate to Setting.
navigate to Setting.
- Click the icon at the top-right corner of the "Send Test Popup" button.
- Enter Phone Number (1), Extension (2) (Phone number and Extension are the required fields). Then click the Send Test Popup button.
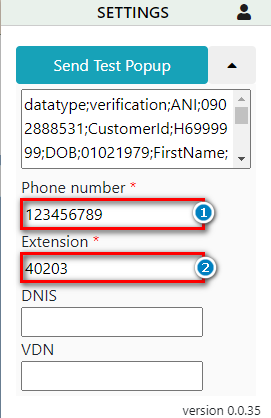
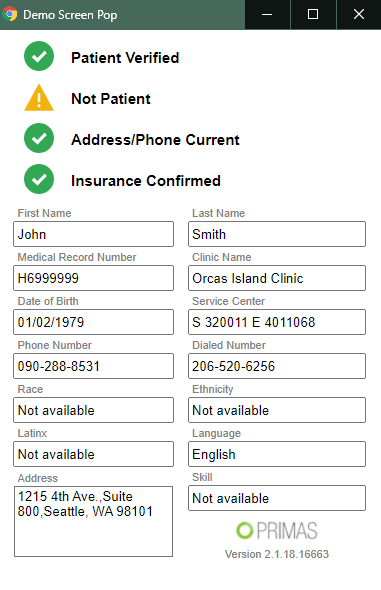
- The demo popup will be shown on the agent desktop. This mean the Web Notifier was connect successfully to the Primas CX system.
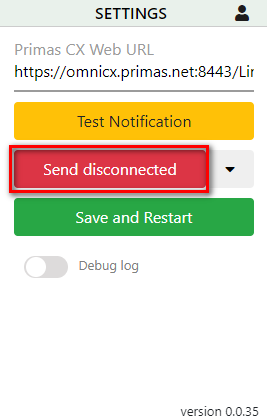
After sending the screen pop successfully, the Send disconnected button will be displayed. You click on it to send the disconnect message to Notifier.
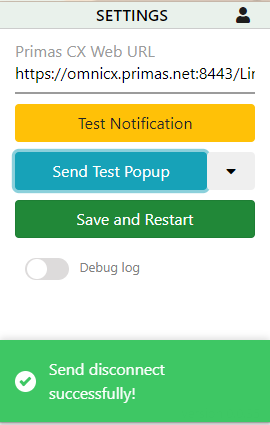
After sending the disconnect message successfully, the system will notify the successful disconnect, and this button change to the "Send Test Popup" button.
Related articles