For Supervisor or Manager role.
Configure DNIS (Facility)
This is the first VDN that receives the inbound call that helps us to identify the Caller ID (ANI).
The steps add new DNIS as below:
- Menu navigation: Configuration → Screen Pop→ DNIS
- Click Add button
- Enter the required information and click Update button
Ref: Add new DNIS
Configure Skill Extension
This is the Hunt Group Extension (not Skill ID).
The steps add new Skill extension as below:
- Menu navigation: Configuration → Screen Pop→ Skill Extension
- Click Add Skill Extension button
- Enter the required information. Make sure:
- Hunt Type is "Hunt Skill"
- Registered checkbox is checked
- Click Update button
Configure Agent Extension
All agent extensions belong to the FreedomQ Hunt Group need to be added into the system for monitoring.
The steps to add new Agent Extension as below:
- Navigate to menu Configuration → Screen Pop→ Agent Extension
- Click Add Agent Extension button
- Enter the required information
- Make sure the Registered, Allow Remote Login, Enable WebRTC checkbox is checked
- Click Update button
Configure Agent Login ID
The steps add new Agent ID as below:
- Navigate to menu Configuration → Screen Pop→ Agent
- Click Add Agent button
- Enter the required information
- Make sure the correct Skills extension of the Agent is selected from the Agent Skills box. This helps the system determine the agent skills to check the agent available from a Skill.
- Click Update button
Ref: Add new Agent
Configure Notifier User
A Notifier user is needed for an agent to receive the screen pop.
The steps add new Notifier as below:
- Navigate to menu Configuration → Screen Pop→ Notifier User
- Click Add User button
- Enter the required information
- Click Update button
View contact report
The view contact report can view the call detail and hear the conversation record between the agent and the customer.
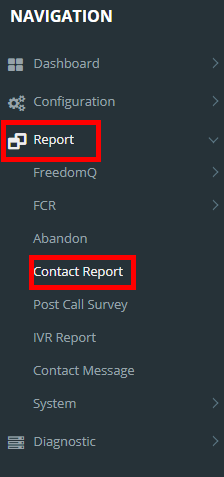
Navigate to the menu: Report → Contact Report
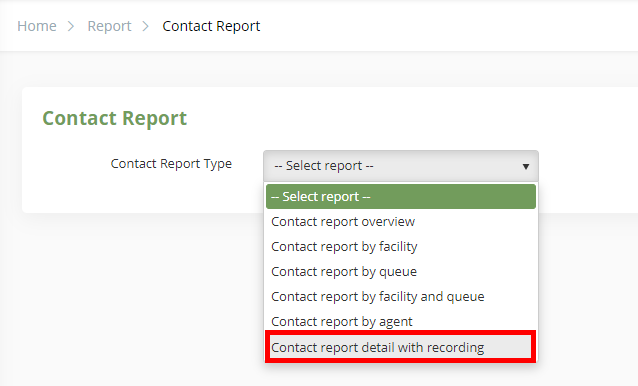
Chose contact report type: Contact report detail with recoding
This is the contact report
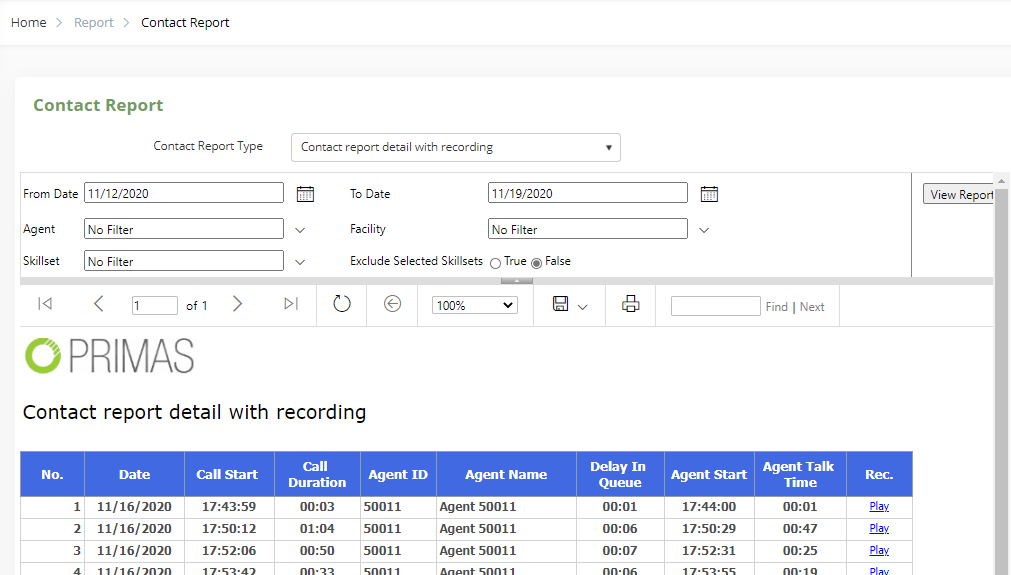
Search

• Date: Search for day
• Agent: Search for agent ID
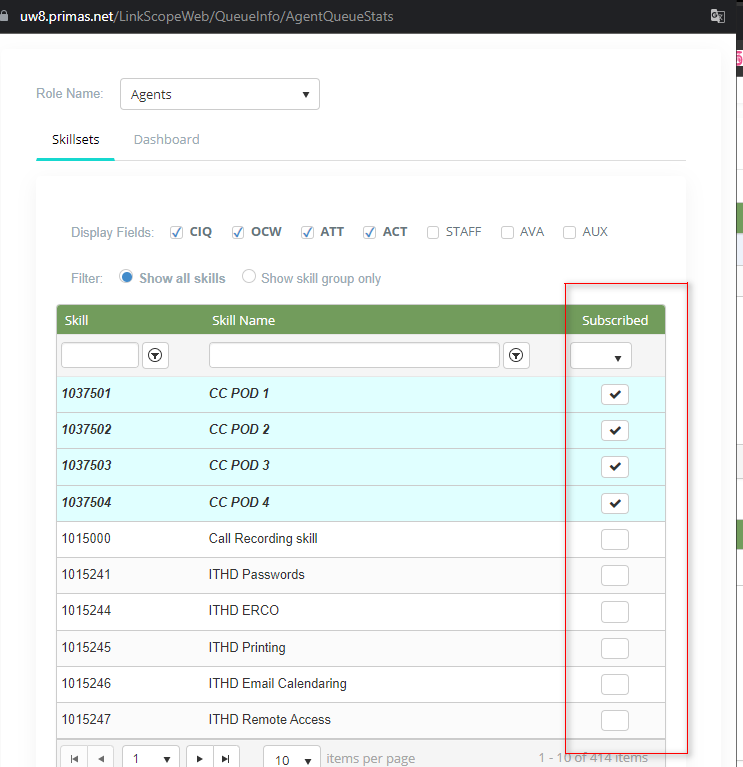
• Skillset: Search for skillset(It is VDN)
• Facility: Search for facility
• Exclude Selected Skillsets
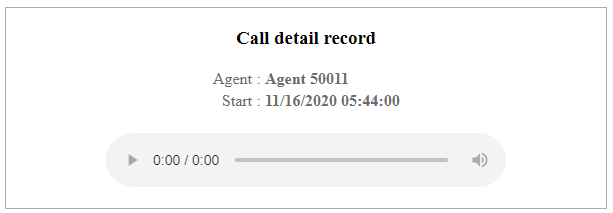
The detail record
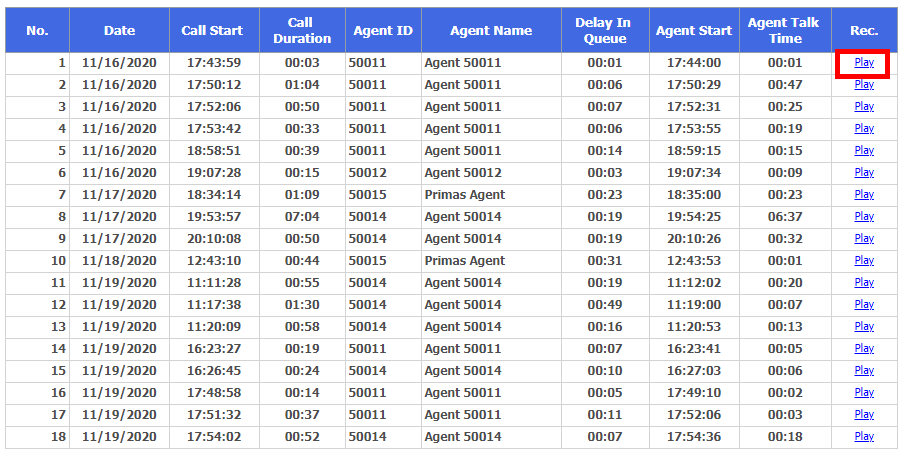
Click Play to hear the record.
This is the record
For the agent role.
Login web application
Login web application with the agent role to using the agent dashboard.
Access to https://genfinity.primas.net/LinkScopeWeb, enter the agent of login information is just created.
Navigate to menu Dashboard → Agent

From the Agent page, click this button![]()
Enter the login information
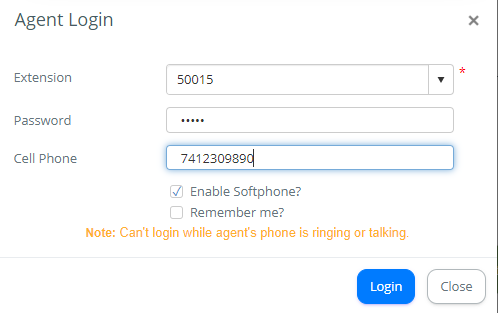
Click ![]()
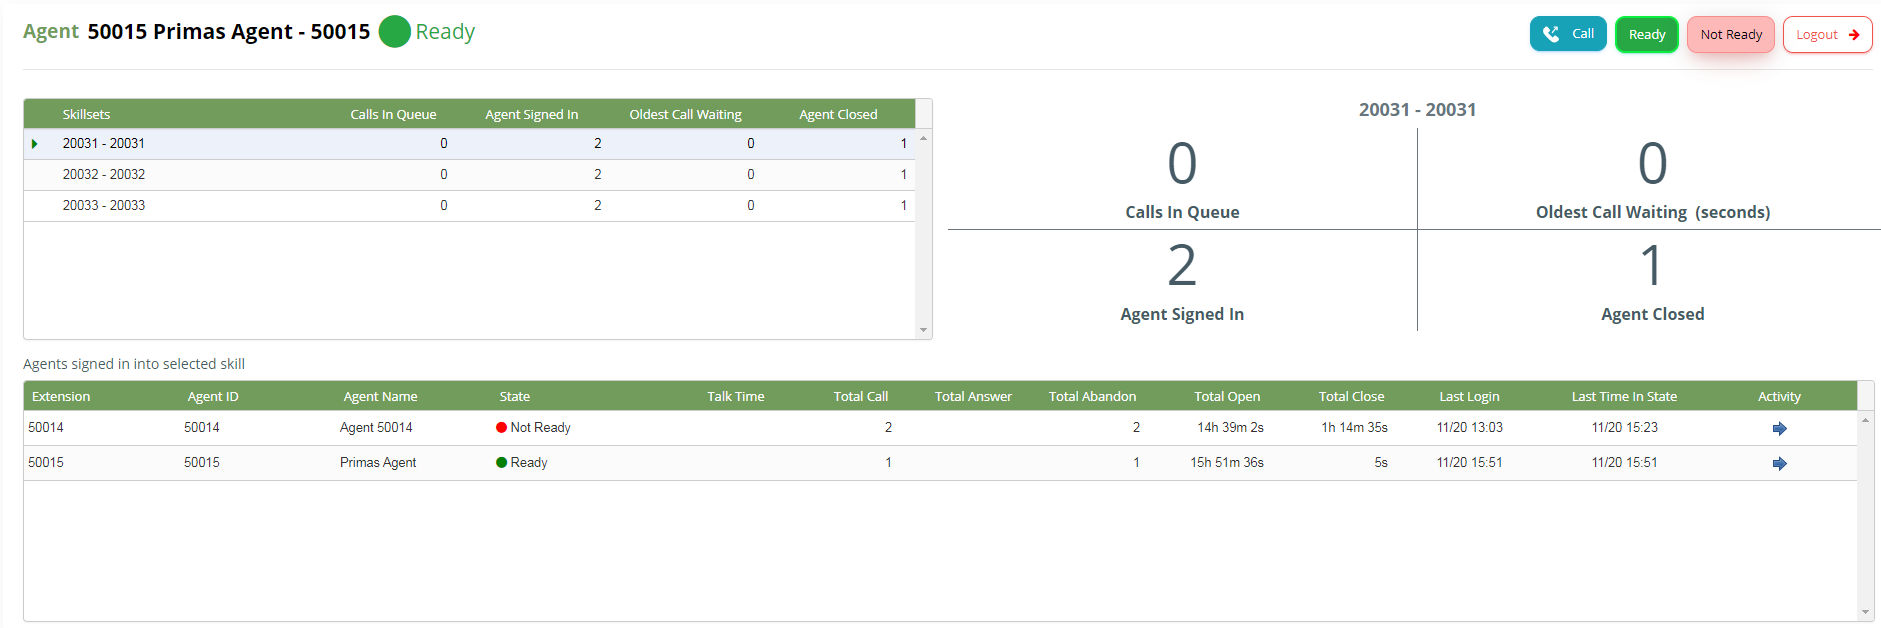
The agent dashboard
The outbound calls.
This feature allows agents to initiate a phone call using call control:
Clicking this button![]() , the system will display the below capture
, the system will display the below capture 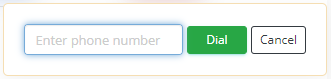
The agents enter the phone number at the text box
Then click Dial
The system makes a call to the phone number of the customer
The states.
The states include Ready and Not Ready to receive a phone call.
The agents can click these buttons to change the working status.
Logout.
Clicking this button allows the agents to logout the agent dashboard.
The hidden components.
The switch agent state![]()
This below capture is agent state which can be Ready or Not Ready

Clicking this switch to display the agent state or hide on the agent dashboard
The switch call control ![]()
This is call control when having incoming calls to agents

The agents can click this switch to display the call control or hide on the agent dashboard
The switch queue info ![]()
The below capture is queue info
Clicking this switch to display the queue info or hide on the agent dashboard.
The switch agent info ![]()
The capture below is agent info

Clicking this switch to display the agent info or hide on the agent dashboard.
The switch screen pop ![]()
The screen pop consists of the detailed information pops to go with the specific call.
Clicking this switch to display the screen pop or hide on the agent desktop.
The switch notification ![]()
The notification is a small notification in the right below of the screen.
Clicking this switch to display the notification or hide on the agent desktop.
Note: The agent need to click this button ![]() to make the agent is ready to receive a phone call from a queue that the agent belongs to.
to make the agent is ready to receive a phone call from a queue that the agent belongs to.
The detailed queue info.
The switch four square ![]()
Clicking this switch to display the queue info detail or hide on the agent dashboard.
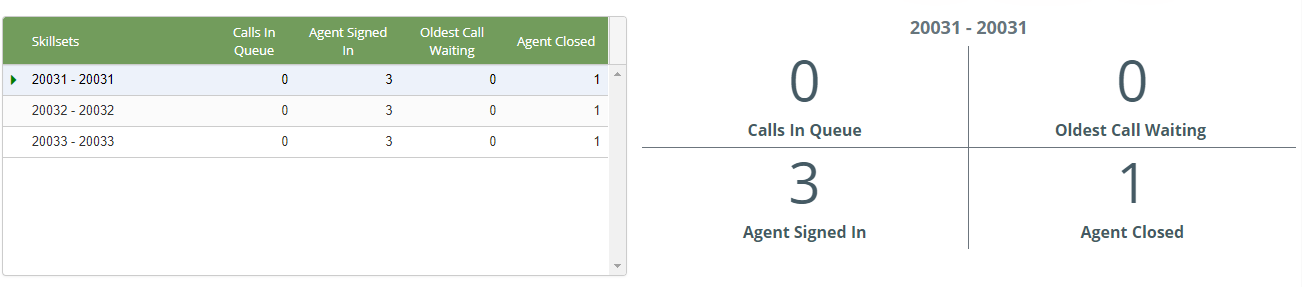
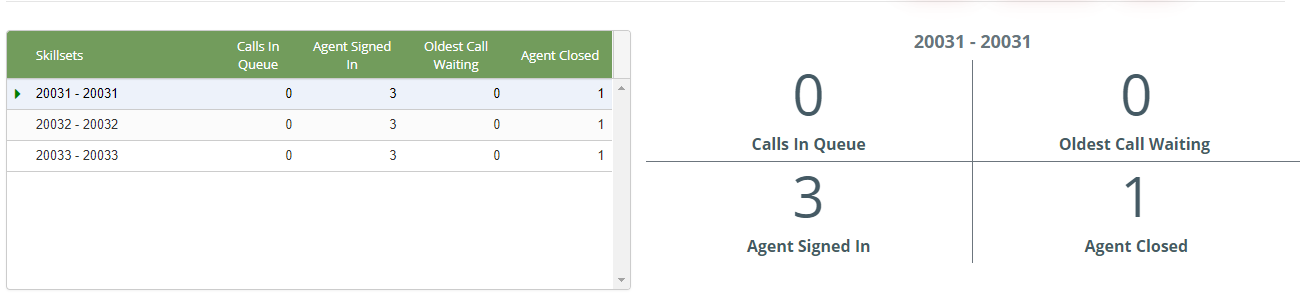
The capture of queue info has two parts: the left table and the right side.
The left table displays five columns: Skillsets, Calls In Queue, Agent Signed In, Oldest Call Waiting, Agent Closed.
| Contents | Description |
Skillsets | Agent skill set |
Calls In Queue | All calls waiting in the queue |
Agent Signed | Show how many agents signed in the specific skill set |
Oldest Call Waiting | The longest time wait in the queue |
Agent Closed | Number of agents not ready |
The right side displays all information of the focused row on the left table.
The detailed agent info.
 The agent information includes:
Contents | Description |
Extension | Extension of agents |
Agent ID | Agent ID |
Agent Name | Name of agents |
State | Work state |
Talk Time | Total time the agents spend talking to the customer |
Total Call | Total incoming call |
Total Answer | Total calls are answered |
Total Abandon | Total calls are abandoned |
Total Open | Total time the agents spend in ready |
Total Close | Total time the agents spend in not ready |
Last Login | The last login time of the agents |
Last Time In State | The last time in the state of agents |
Activity | All detailed activity of agents |
Logout | Click to log out agent |
The FreedomQ Summary.
The switch FreedomQ Summary ![]()
Clicking this switch to display the FreedomQ Summary or hide on the agent dashboard.

Clicking in the tile "FreedomQ Summary" then the system will open the "FreedomQ Dashboard"
The Waitlist Queue Summary.
The switch WaitlistQ Summary ![]()
Clicking this switch to display the Wailist Queue Summary or hide on the agent dashboard.

Clicking in the tile "Waitlist Queue Summary" then the system will open the "Offline Queue Application Dashboard" or click special row to open the detail of Offline Queue Application
The agent activity report.
At the detailed agent info table, the agents click the blue arrow to go to the agent activity report.

This is the agent activity report.
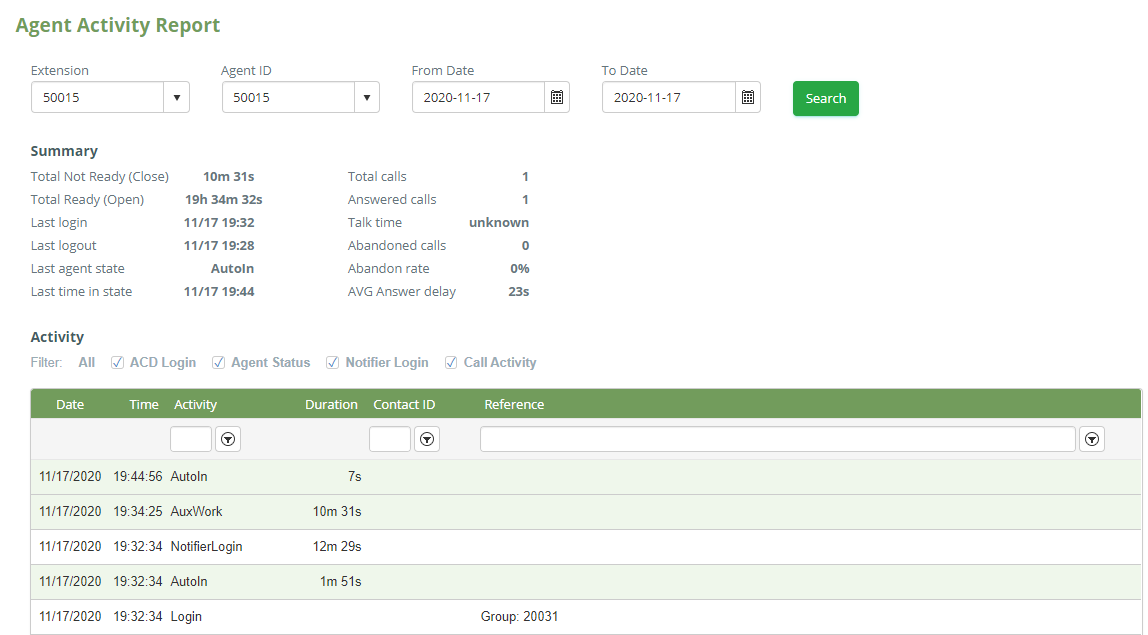
Search

The agents can search at 4 fields: Extension, Agent ID, From Date, To Date. Then click Search to receive the result.
Summary
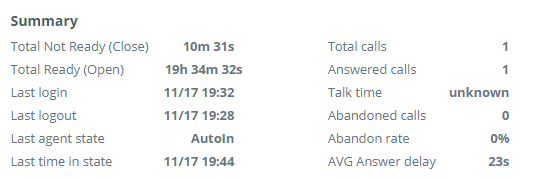
Contents | Description |
Total Not Ready (Close) | Total time the agents spend in not ready |
Total Ready (Open) | Total time the agents spend in ready |
Last Login | The last login time of the agents |
Last Logout | The last logout time of the agents |
Last Time In State | The last time in the state of agents |
Total Calls | Total incoming call |
Answered Calls | Total calls are answered |
Talk Time | Total time the agents spend talking to the customer |
Abandoned Calls | Total calls which ring to the agent but agent not answer today |
Abandon Rate | Abandon rate today |
AVG Answer delay | Average time to wait for the customer |
Activity
The system will report for agent activity for 4 categories
• Call activity
• ACD Login/Logout activity
• Change State activity
• Notifier Login/Logout activity
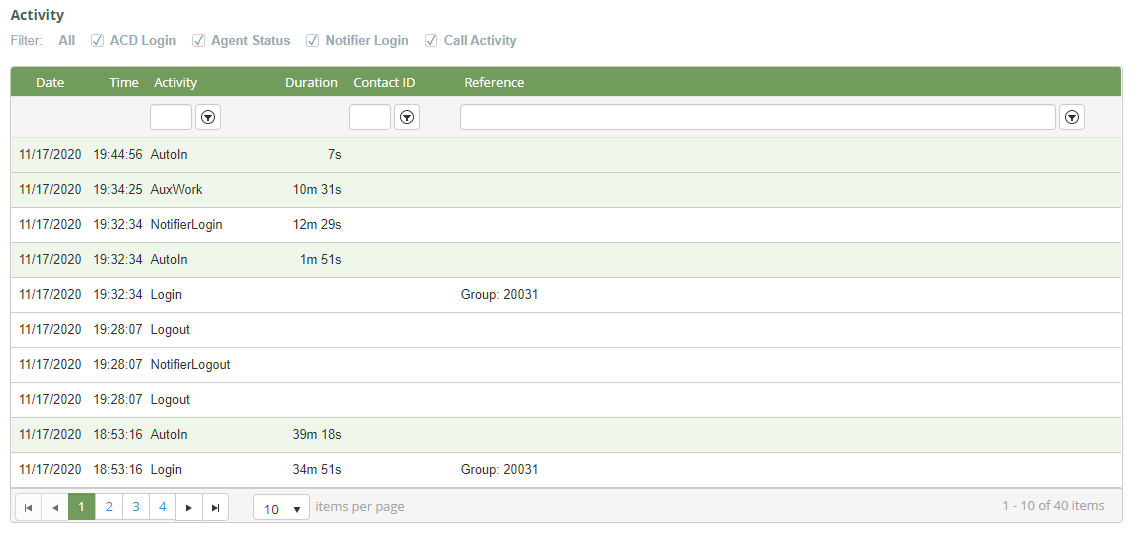
The activity default shows all activity includes: ACD Login, Agent Status, Notifier Login, Call Activity. The agents can select one of these.
Situation 1: The agents can choose only ACD Login, the activity includes: Login and Logout
Situation 2: The agents can choose only Agent status, the activity includes: Ready and Not Ready
Situation 3: The agents can choose only Notifier Login, the activity includes: NotifierLogin and NotifierLogout
Situation 4: The agents can choose only Call Activity, the activity includes: Ring, Answer, CallEnd, PlaceCall, Transfer, Conference, Hold, Retrieve
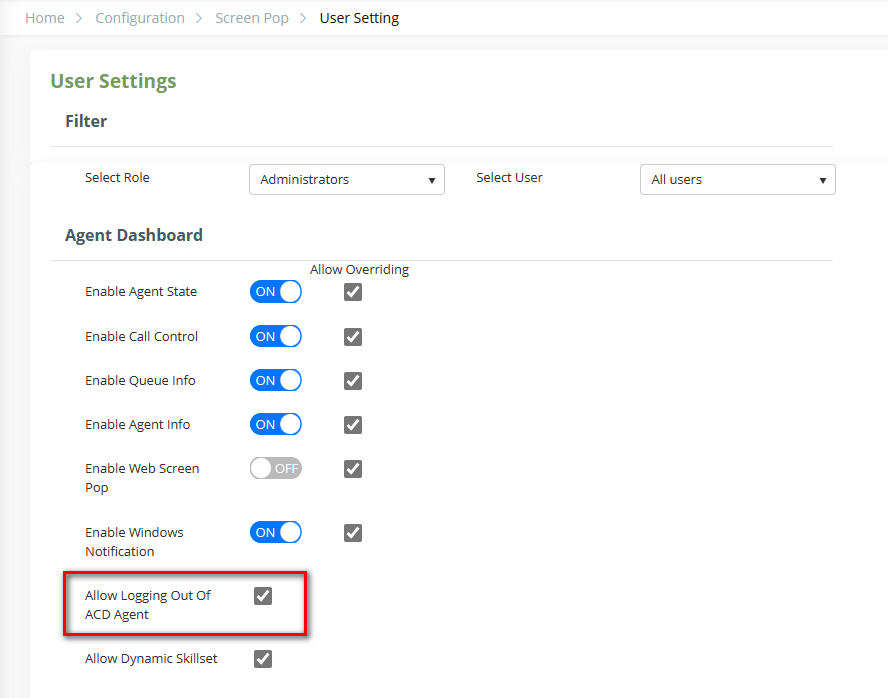
The logout the ACD agent feature.
At the detailed agent info table, the supporter click the logout button to log out the agent.

Logic displays the logout button in the "Logout" column
- Turn on the "Allow Logging Out Of ACD Agent" option
- Location: Home > Configuration > Screen Pop > User Setting
- Location: Home > Configuration > Screen Pop > User Setting
- Admin Role: always show the button
- Another Role: Depends on the skill(skill group) assigned to the role
- Turn on the "Allow Logging Out Of ACD Agent" option