Step-by-step guide
- Go to Linkscope Web application and if you're not already signed in, select Sign in.
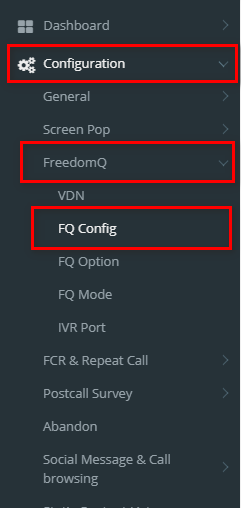
From the Linkscope Web application, you click to Configuration → FreedomQ → FQ Config at the menu.
ADD A FQ CONFIG
- Click button, the Add popup is displayed.
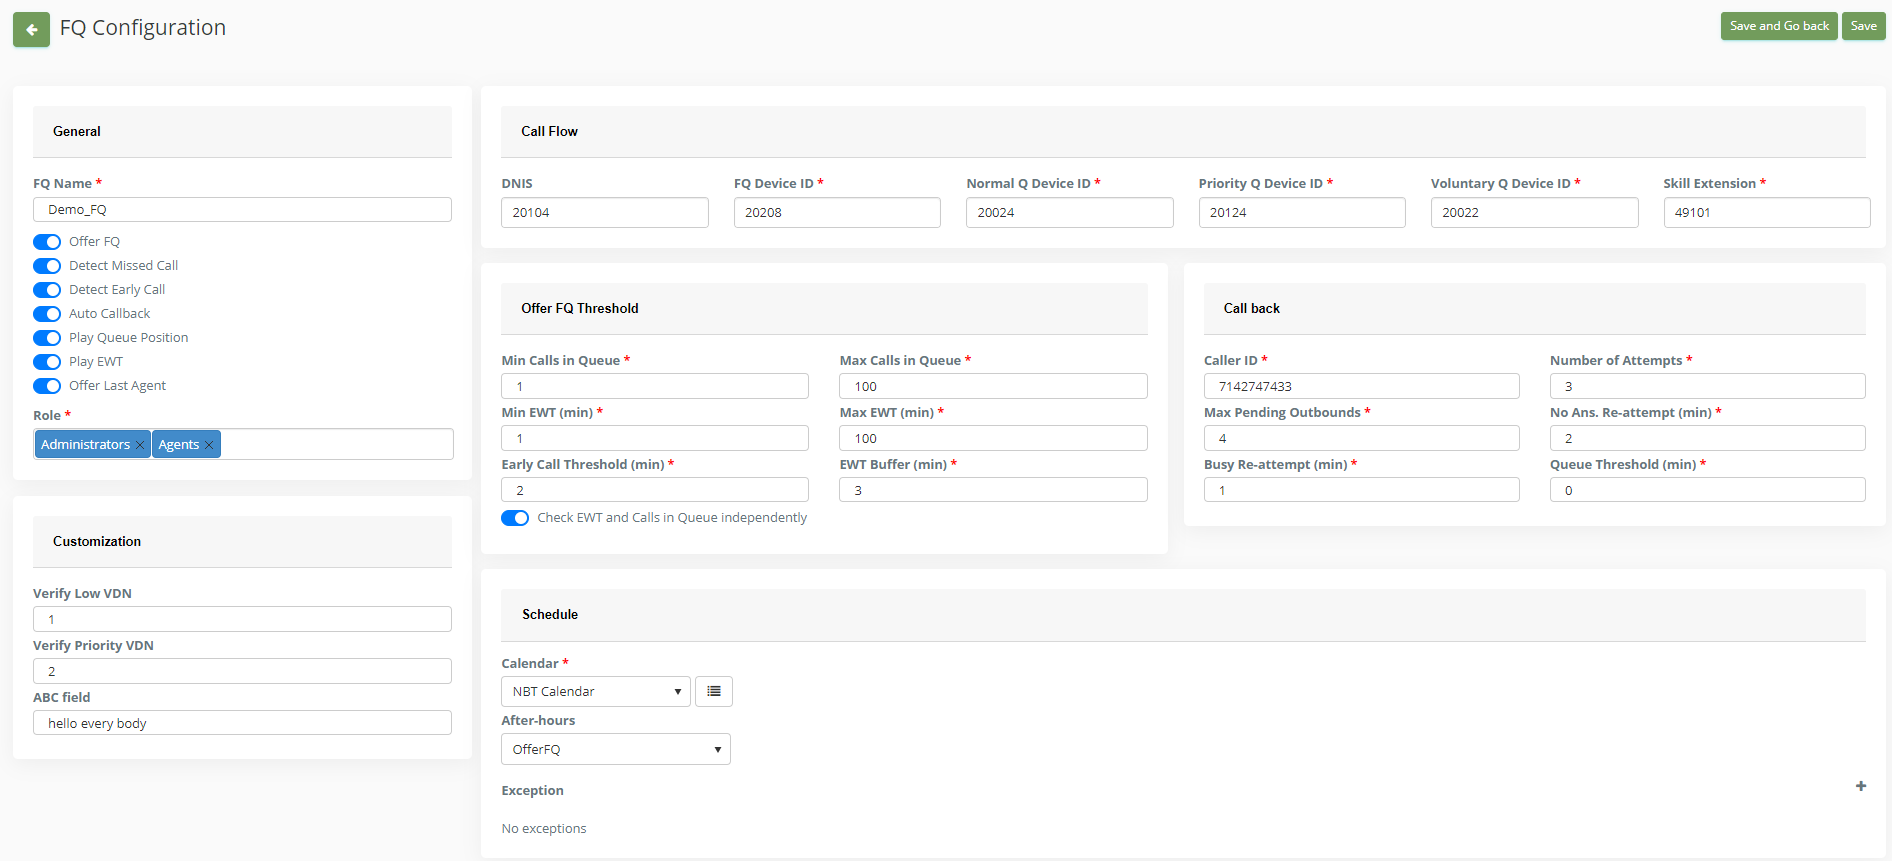
- From the Add popup, you enter the required information:
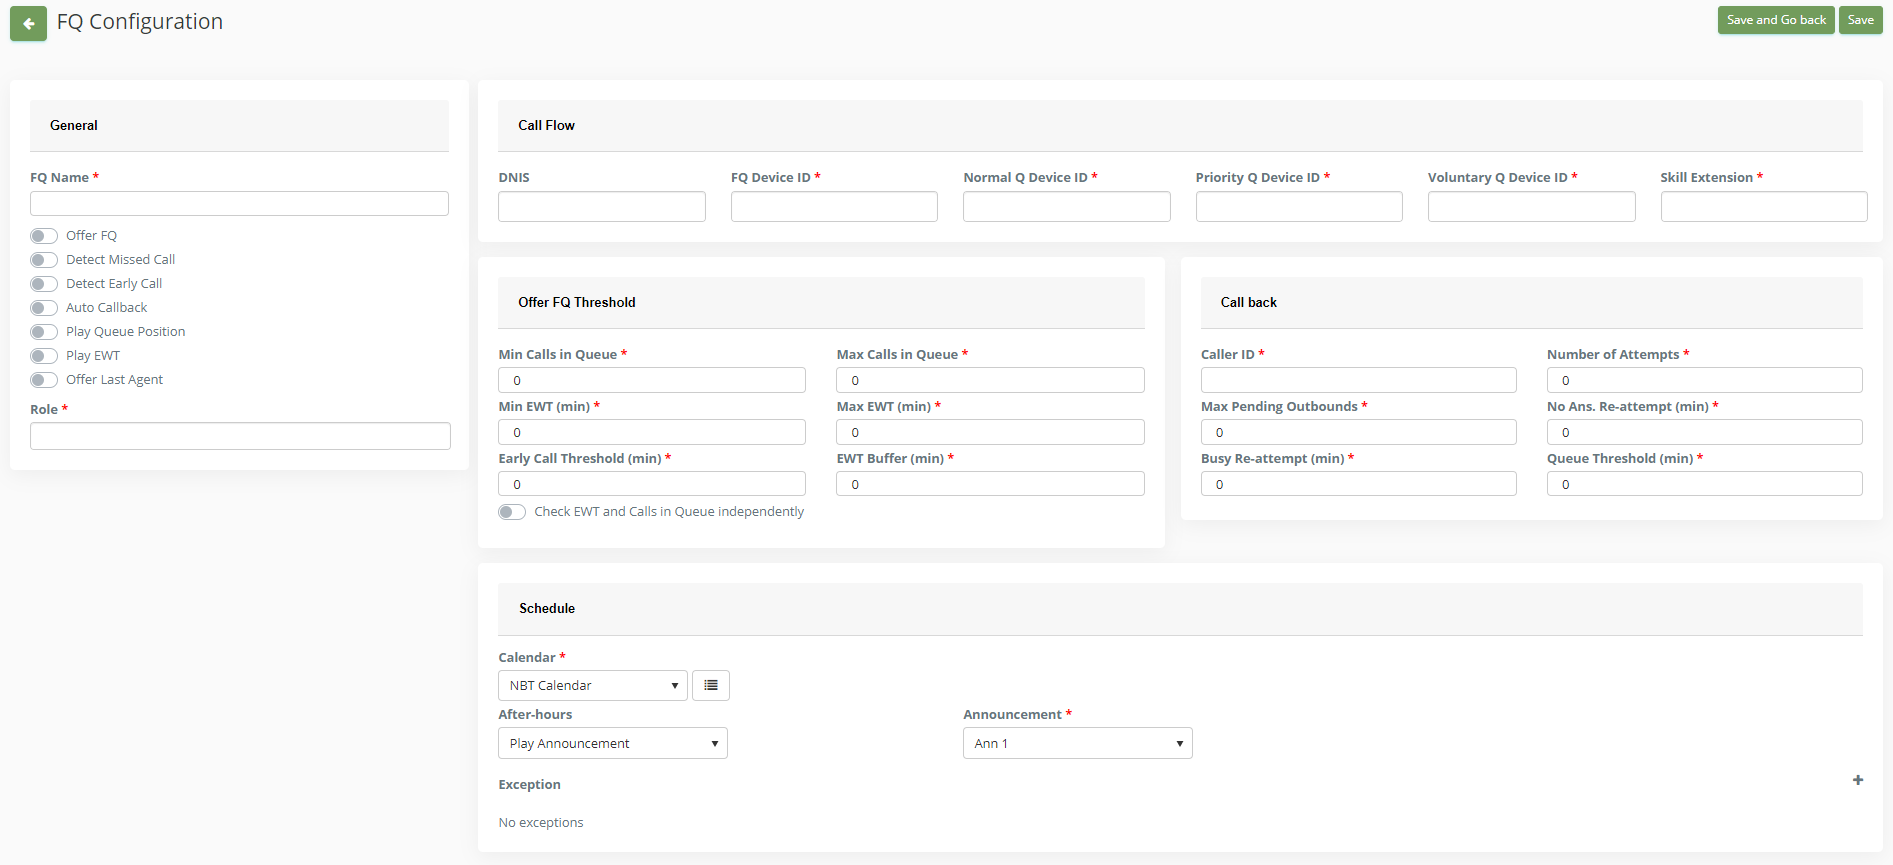
- General
- FQ Name: It should be the queue name.
- Offer FQ: Turn on/off FQ Offer for this queue.
- Detect Missed Call: Indicates whether the system will detect the missed call based on the phone number to offer the features for the missed calls.
- Detect Early Call: Indicates whether the system will detect the early call based on phone number to offer the features for the early calls.
- Auto Callback: Indicates whether the system will call back the caller automatically based on the estimated waiting time and queue position. If this option is off, a user will need to call back the caller manually from the FreedomQ dashboard.
- Play Queue Position: Indicates whether the system will play the current number of calls in queue to the caller.
- Play EWT: Indicates whether the system will play the current estimated waiting time of the queue to the caller.
- Offer Last Agent: indicates whether the system will offer the last agent routing feature to the caller.
- Role: Select the user roles that can manage the FQ Config for the queue. If the user is a supper administrator, it will display all FQ Configs to the user.
- Call Flow
- DNIS: The first Device ID will handle the inbound calls. It is DNIS VDN in the VDN configuration.
- FQ Device ID: The Device will route the call to FQ application. FQ Device ID needs to be a unique number in FQ config. It is FQ VDN in the VDN configuration.
- Normal Q Device ID: The Device will route the call to a normal queue. The FQ application will route the call to this device if it doesn't offer a callback to the caller or the caller denied the callback offer. Normal Q Device ID needs to be a unique number in FQ config. It is Agent VDN in the VDN configuration.
- Priority Q Device ID: The Device will route the call to a priority queue. The FQ application will route the call to this device when it calls back the caller and the caller answer the callback call. It is FQ Priority VDN in the VDN configuration.
- Voluntary Q Device ID: The Device will route the call to a priority queue in the case of a missed call or the caller returns too early before the estimated callback time. It can be the same as Priority Q Device ID.
- Skill Extension: The monitored skill for the wait time and calls in queue. This is the actual queue that the Normal Q and Priority Q devices will transfer the call.
- Offer FQ Threshold
- Min Calls in Queue: The minimum calls in queue threshold. The system won't offer the callback if the number of calls in the queue is less than this value and the EWT threshold is not met.
- Max Calls in Queue: The maximum calls in queue threshold. The system won't offer the callback if the number of calls in the queue is over this value and the EWT threshold is not met.
- Min EWT (min): The minimum estimated wait time (EWT) threshold. The system won't offer the callback if the EWT in minutes is less than this value and the calls in queue threshold is not met.
- Max EWT (min): The maximum estimated wait time (EWT) threshold. The system won't offer the callback if the EWT in minutes is over this value and the calls in queue threshold is not met.
- Note: EWT can be the Average Wait Time or Oldest Wait Time ups to the General FQ Configuration.
- Early Call Threshold (min): If the person calls back before the estimated callback time but within this time period, the system allows sending the call to a priority queue.
- EWT Buffer (min): When the system offers the callback, it will prompt the caller to the EWT is the current EWT plus this buffer value.
- Check EWT and Calls in Queue independently: Indicates whether the system checks both calls in queue and EWT thresholds are met before offering FQ or just needs one of 2 conditions to meet.
- Call back
- Caller ID: The calling phone number will be displayed as the Caller ID for the callback call.
- Number of Attempts: The number of times the system will try to make the callback if the call gets FAILED signal when the system calls back the customer.
- Max Pending Outbounds: If the number of pending calls is over this value, don't make a new outbound call for the callback. A callback call is pending if it is active and has not been delivered to an agent extension. This value should equal the number of working agents in the queue. If this value is ZERO, the auto callback will be disabled.
- No Ans. Re-attempt (min): The time between each rescheduled callback if ring no answer. (minute)
- Busy Re-attempt (min): The time between each rescheduled callback if busy. (minute)
- Queue Threshold (min): Stop auto callback if the estimated wait time is over this threshold (minute)
- Schedule
- Calendar: The calendar will be applied for this FQ config.
- After-hours: What should the system do after normal working hours (offer FQ, transfer to Custom Destination or play an announcement)?
- Exception:
- Apply To: This exception will be applied to normal working days or non-working days.
- From: The start time of the exception.
- To: The end time that the exception.
- Call Routing: How the call will be routed in this time range. Can be one of the following values:
- Inherit: inherit from the parent configuration.
- Offer FQ: offer callback for the inbound calls during this time range.
- Transfer call to Queue: transfer the inbound calls to the Normal Queue during this time range.
- Play Announcement: play an announcement to the inbound calls during this time range.
- Transfer call to Custom Destination: transfer the inbound calls to a custom destination during this time range.
- General
- Note: If Minimun EWT and Minimun Queue Position = 0: it always offers FQ.
- Click Save or Save and Go back button
If the system shows the message "Successfully saved configurations.", you created successfully FQ Config.
Other General FQ Configurations
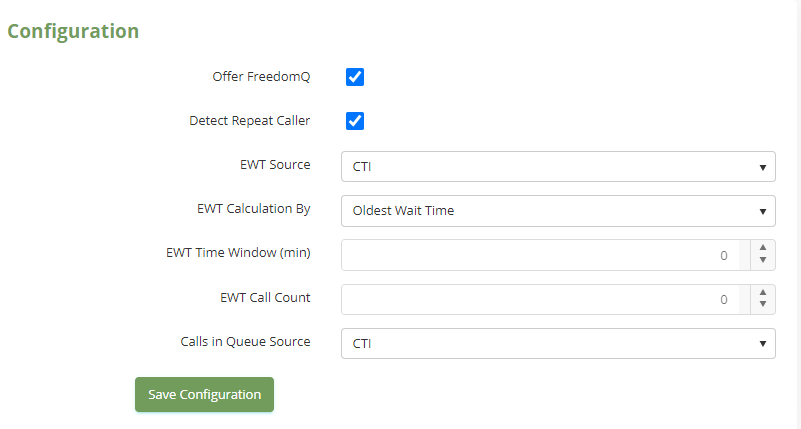
General Configuration (this section only needs to configure once and for a technical person only)
Offer FreedomQ: Turn on/off FQ Offer feature for all queues.
- Detect Repeat Caller: Indicates whether the system will detect the repeat caller based on phone number to offer the features for the repeat calls.
EWT Source: This indicates that the system will get the queue wait time information from CTI message calculation, or from CM integration.
EWT Calculation By: Choose the calculation algorithm for the system to estimate the wait time. It can use the AVG wait time or the Oldest call wait time. If EWT Source = CM, EWT Calculation By is always the Oldest call wait time.
EWT Time Window (min): If EWT Source = CTI and EWT Calculation By = AVG Wait Time, this value tells the system the time window that the system will calculate the wait time for the calls that already went out of queue within this time window.
EWT Call Count: If EWT Calculation = AVG Wait Time, this will tells the system how many last calls already went out of the queue that it will use to calculate AVG wait time.
Calls in Queue Source: This indicates that the system will get the calls in queue information from CTI message calculation, or from CM integration.
Note
If you select EWT Source = CM, you need to config integrate with OSSI at Configuration → Screen Pop → CTI Link page.
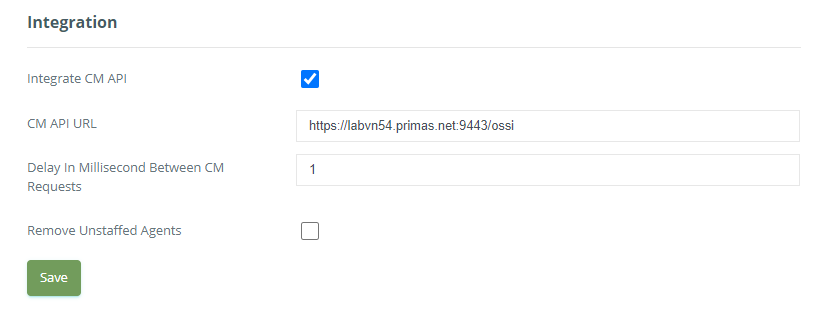
Tick the check box "Integrate CM API".
CM API URL: The API URL to integrate with CM.
Delay In Millisecond Between CM Requests: When the system sends requests to the OSSI API, it will set a delay between the requests.
Remove Unstaffed Agents: When the system sends a request to CM API for queue information and the API returns the list of logged-in agents, should the system remove the agents that are not in this list from the agent logged-in list in the system?
EDIT A FQ CONFIG
- On the FQ Config table, select any row you want to edit.
- Click button on that row. The Edit popup is displayed.
- Form Edit popup, you modify values. Then click the Save and Go back or Save button.
If the system shows this message "Successfully saved configurations.", you edit successfully FQ Config.
DELETE A FQ CONFIG
- On the FQ Config table, select any row you want to delete.
- Click button on that row.
- There're alert displays after you click to this button. Select OK.
If the system shows this message, you deleted successfully another device.
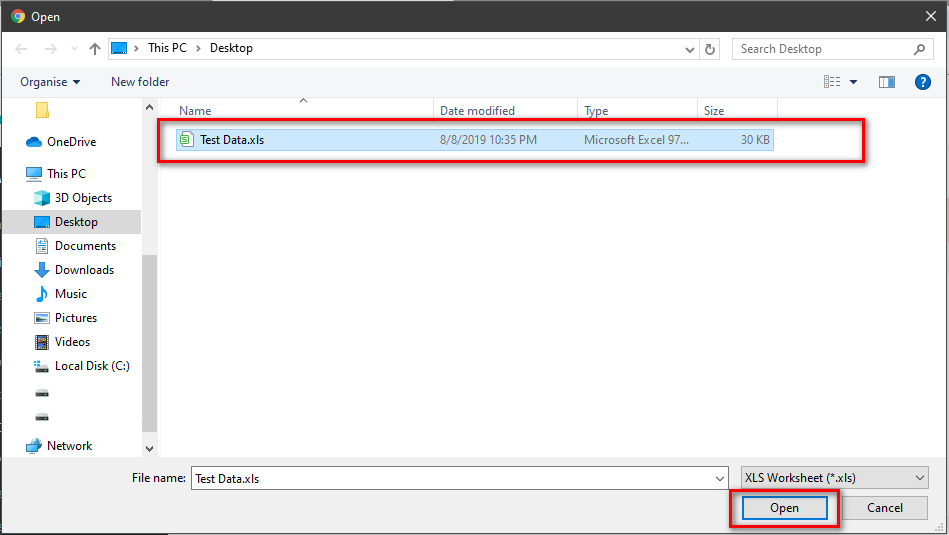
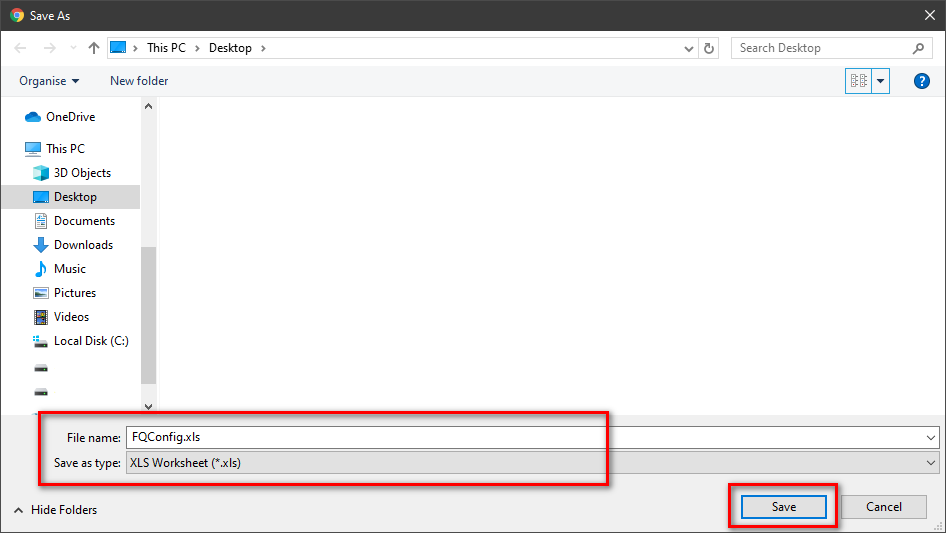
IMPORT FROM/ EXPORT TO AN EXCEL FILE
Related articles
