In order to install Primas CX components, the user performs the following steps:
- Select features and components to install.
- Preview prerequisites.
- Input configuration such as database, port, CTI Link information.
- Review all installation and configuration.
- Checking results.
Step-by-step guide to configuration
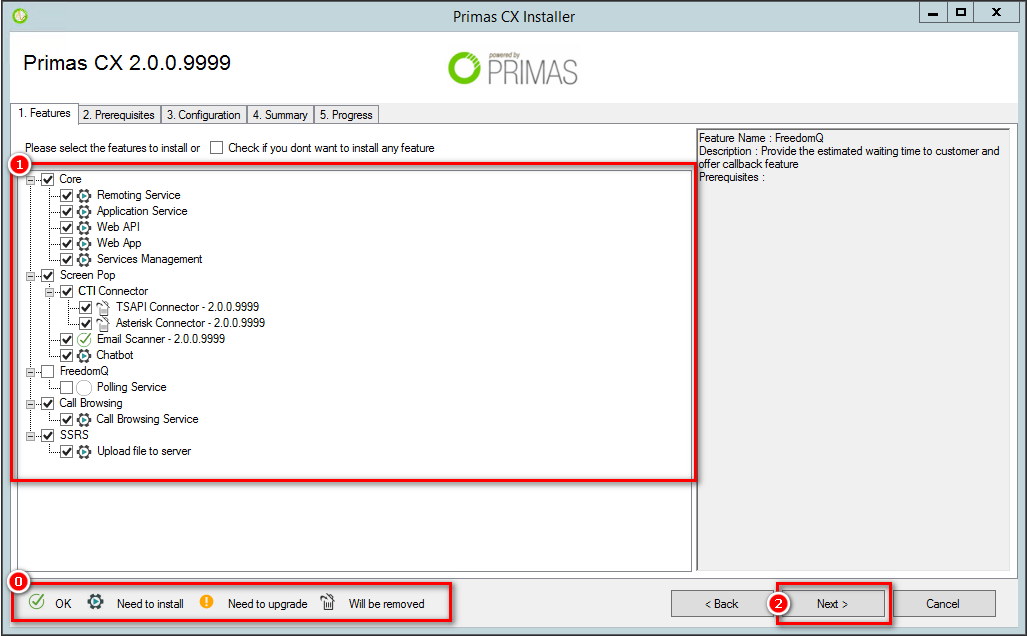
1. Select features and components to install
Run the LinkScopeInstaller.exe.
Check the features status information, then select features and components you want to install.
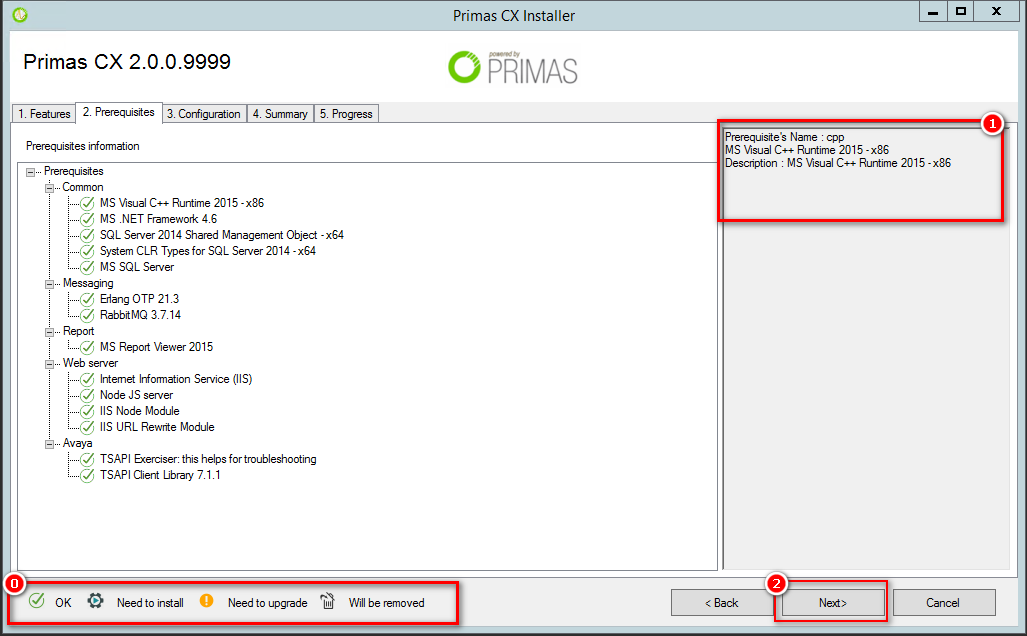
2. Preview prerequisites
3. Configuration the features
- Database
- RabbitMQ
- Web API
- FreedomQ
- Email Scanner
- TSAPI Connector
- Asterisk Connector
- Call browsing & Chatbot
- Features
Go to the Configuration/Features and select the features you want to apply. Then click the button Save it. - SMTP Server
- SSRS Report
Note
If you reconfiguration the feature on Installer PrimasCX or if there is any change from the beginning, the features will display a * symbol.
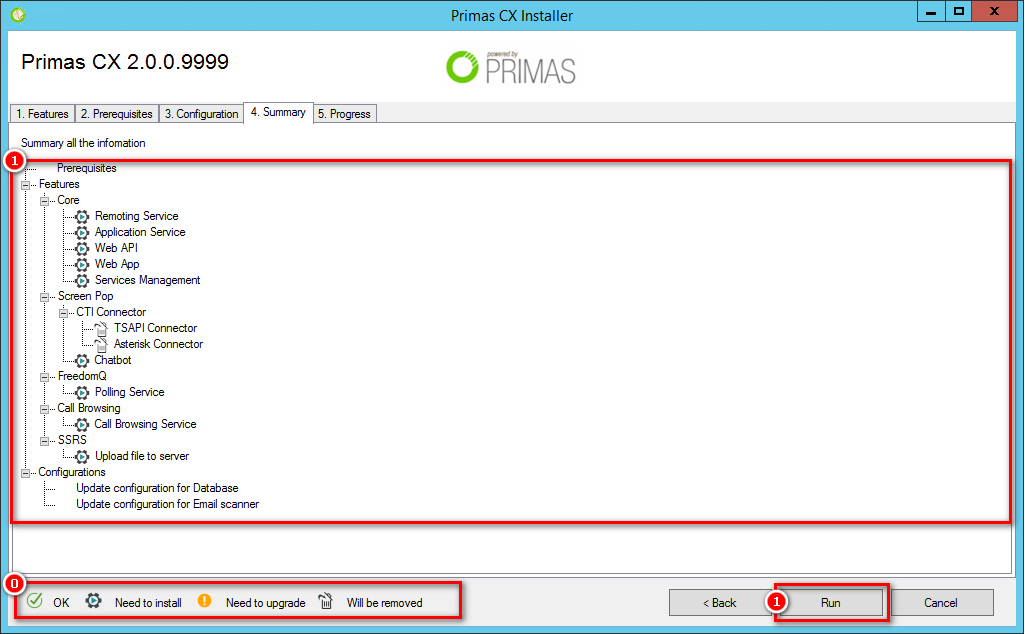
4. Review all installation and configuration
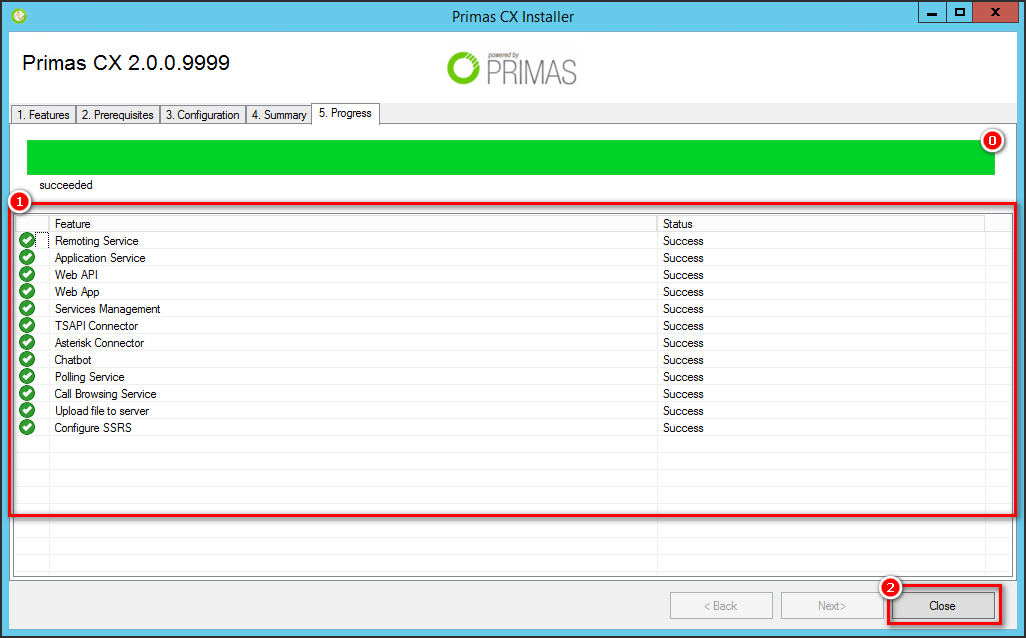
5. Checking results
Related articles


