Step-by-step guide
- Go to Linkscope Web application and if you're not already signed in, select Sign in.
- From the Linkscope Web application, you click to Configuration →General→ Announcement at the menu.
ADD A NEW ANNOUNCEMENT
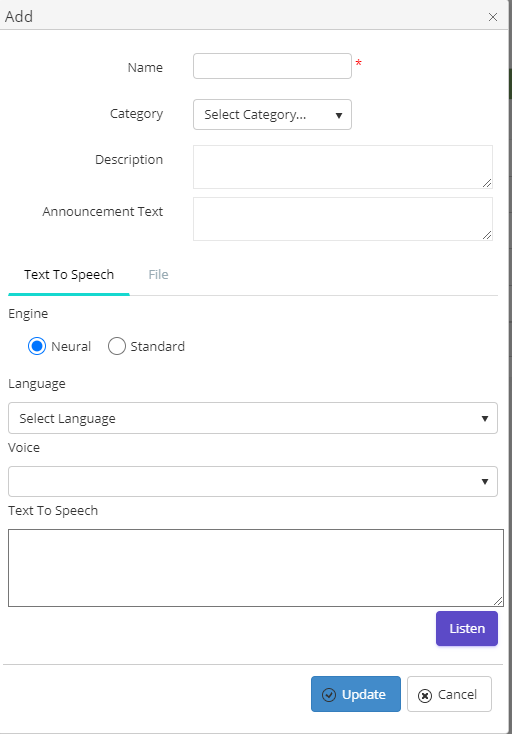
- Click button . The Add popup is displayed.
2. At the Add popup, enter the information
| Field | Required | Description |
|---|---|---|
| Name | Yes | |
| Category | No | Values: FreedomQ: using for Freedom Queue application Voicemail: using for Outbound Call application Disclosure: using for Outbound Call application |
| Description | No | |
| Announcement Text | No | |
| Text to speech/File | Yes | The Announcement required file audio (mp3/wav) or using Text to speech (AWS) to convert text to audio |
3. Then click button.
Note: If the system shows this message, you created successfully a new Calendar.
UPDATE A ANNOUNCEMENT
- On the Announcement List table, select any row you want to edit the Announcement.
- Click button on that row. The Edit popup is displayed.
- At Edit popup, you modify data. Then click the button.
Note: If the system shows this message, you edited successfully a Calendar.


