Summary
This guideline will help you configure the Web Notifier in WebApp. There are two main parts:
- Web Plugin configuration.
- Notifier user setting.
- Configuration troubleshooting.
Part 1. Web Plugin configuration
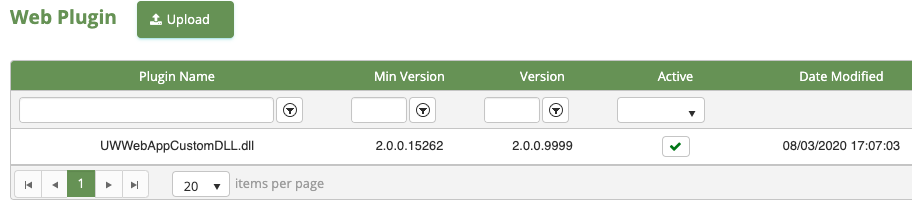
The main configuration which decides the Screen-pop will show to the agent or not is Web Plugin configuration. The configuration is placing in Configuration/Screen Pop/Web Plugin of the SiteMap tree.

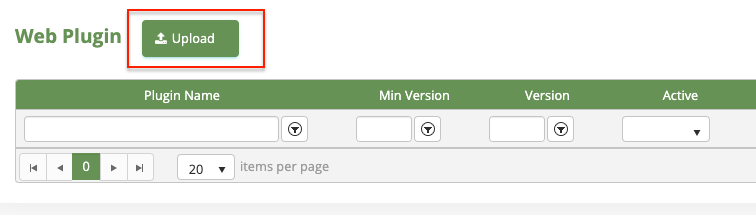
To upload or update a version of Web Plugin, you should do these following steps:
Step 1: Upload the web plugin.
The default active configuration after uploading the new web plug-in is INACTIVE with the red circle.
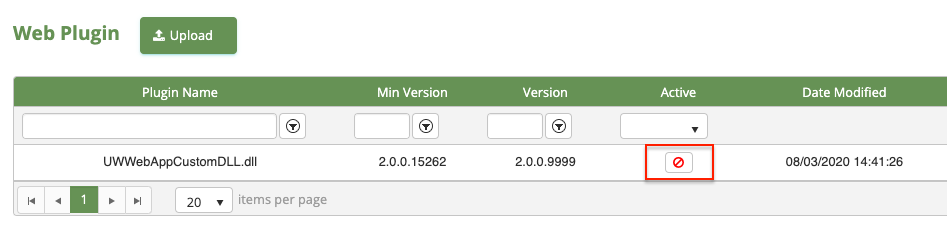
If the web plug-in state is in INACTIVE state, the Web Notifier will have NO action for this Web Plugin.
NOTE:
The valid web plugin must follow these following rules:
- A plugin in DLL form which was create with the guideline in primas confluence.
- If you uploaded the DLLs which was extested in the system, the only case was accepted is the DLLs that have the higher version tag.
- If you upload the DLLs which is generated in MVC framework to the system. The Primas CX will die. (See how to fixed it)
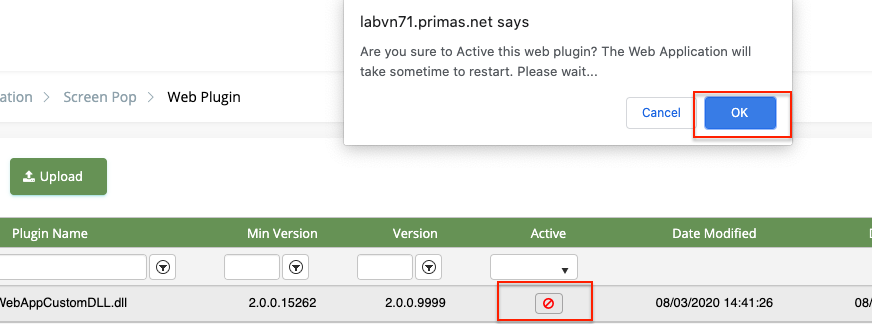
Step 2: Active and configuration
Click to the icon in the Active column, then confirm. It will take a while to restart the web application.
After a minute, the active state turn to ACTIVE with a green check.