Step-by-step guide
To add new a DNIS:
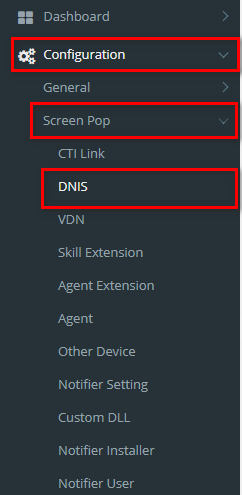
- While logged into LinkScopeWeb, navigate to the following: Configuration → Screen Pop→ DNIS.
- Click
 button, the Add popup is displayed. button, the Add popup is displayed.
- At the Add popup, you enter DNIS, DNIS Name, Toll Free, DID, Role into the textbox. Then click the Update button.

If the system shows this message, you created successfully a DNIS.

|
| You may also want to use visual panels to communicate related information, tips or things users need to be aware of. |
Related articles
Related articles appear here based on the labels you select. Click to edit the macro and add or change labels.
